This manual page is for our 6-2 easy controller, which allows you to control:
Jump to
Front panel description
Rear panel description
Parameters
WiFi and Output configuration/set
WiFi
Output connectors description
Output driver settings
PTT IN and OUT
Principle of USED LED
OTRSP - USB protocol for SO2R
Remote control
QUICK setup
QUICK setup - manual way
Controller IP address
Access to web User interface (UI)
IP access to the UI
Configuration page
After configuration page
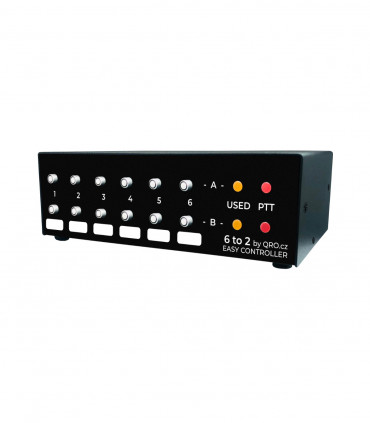
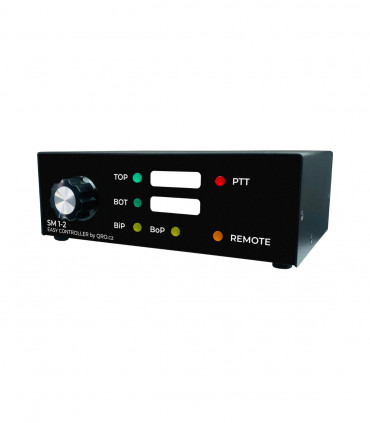
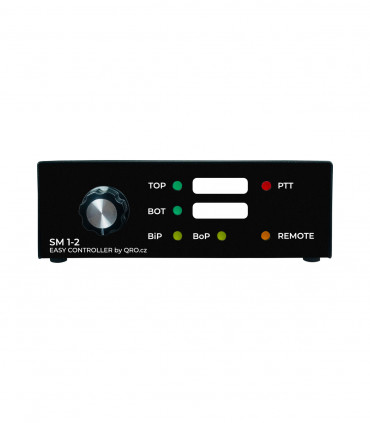
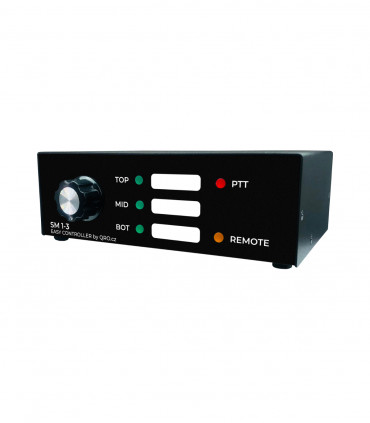
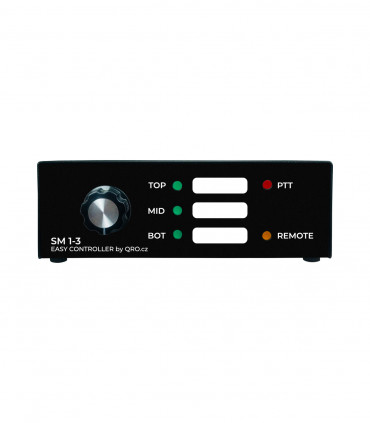
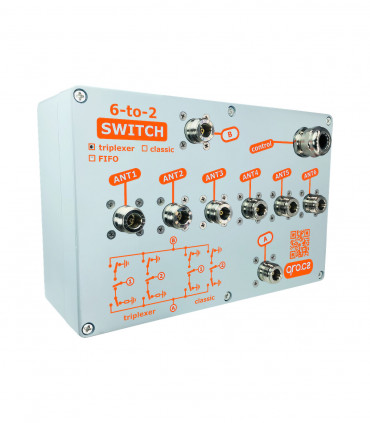
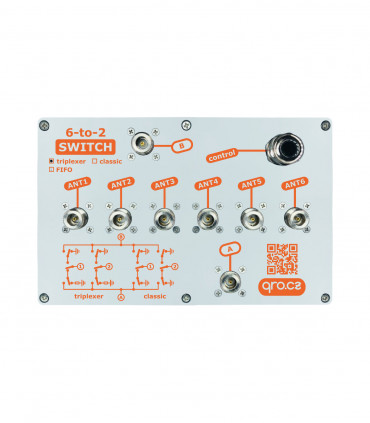
Product details
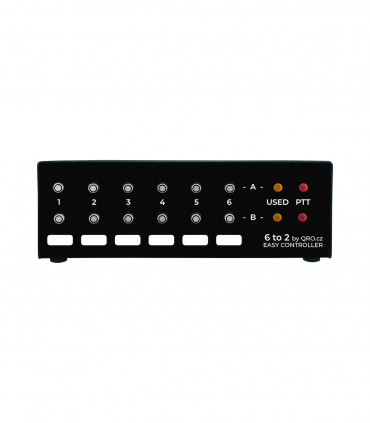
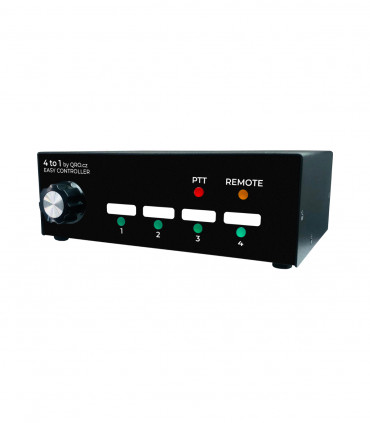
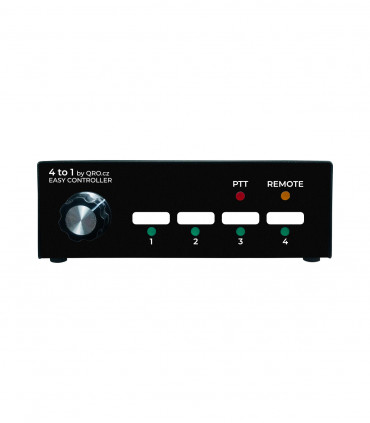
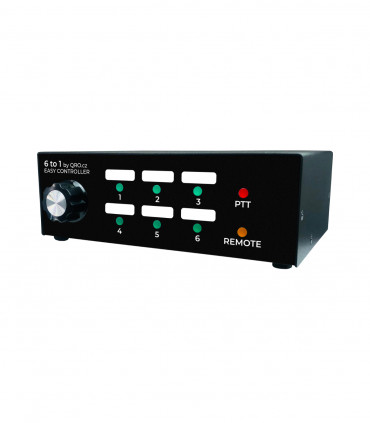
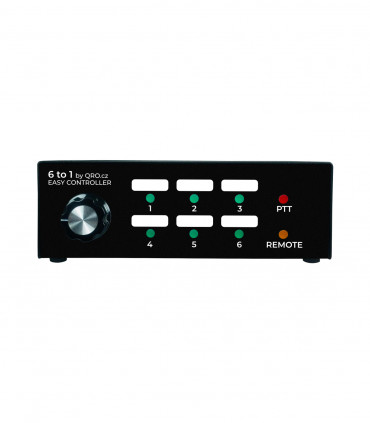
Front panel description
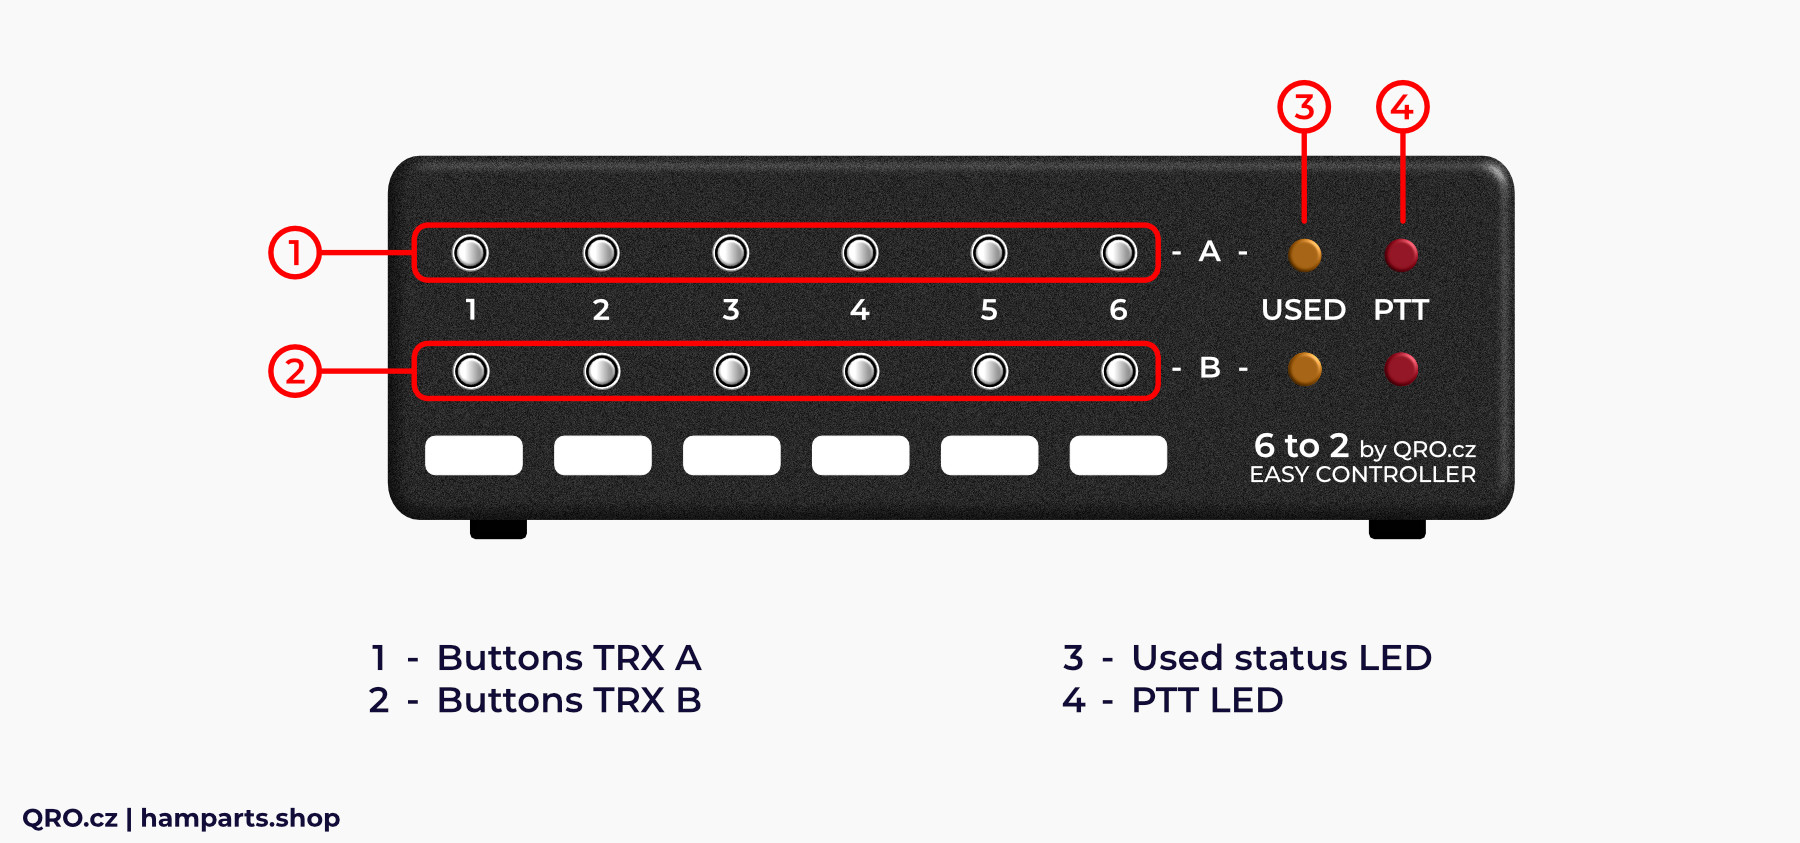
1. & 2. Buttons TRX A and TRX B
- Press buttons with LED, ports 1 to 6 for each TRX (A and B)
3. Used status LED
- Indication of antenna collision or no antenna selected
4. PTT LED
- PTT indication for TRX A and TRX B
Rear panel description
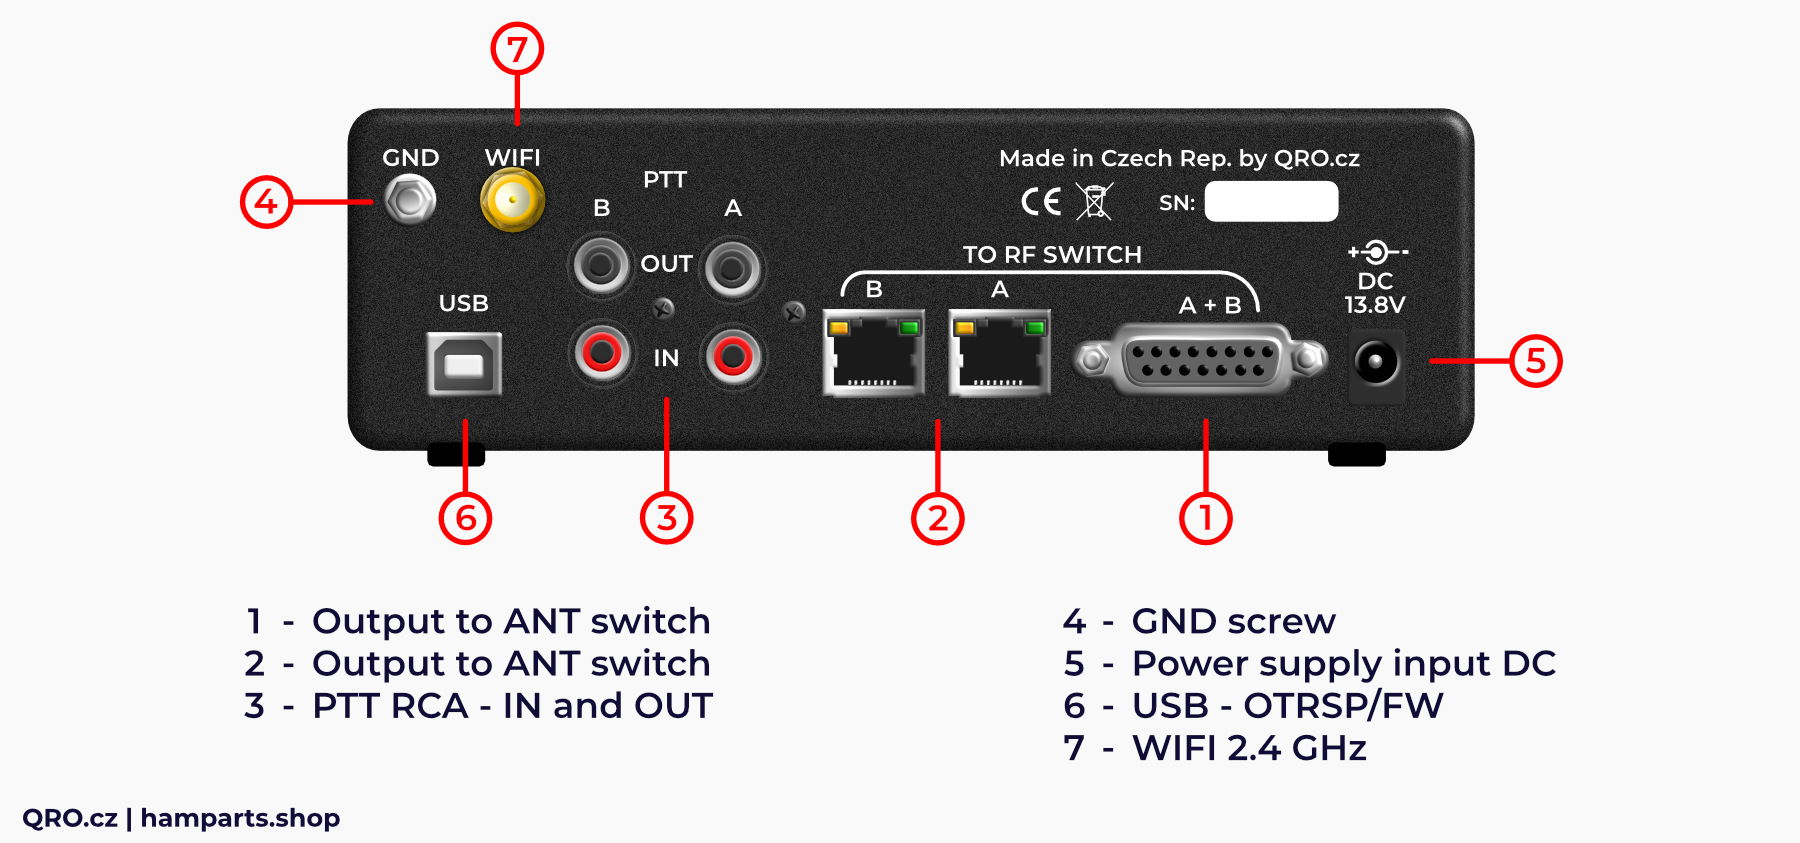
1. Output to ANT switch
- Output DB15 female connector - outputs A and B, Vext etc.
2. Output to ANT switch
- Outputs RJ45, one for each bank (A and B)
3. PTT RCA
- PTT IN and OUT for each TRX and PA
4. GND screw
- There are high voltage protections - to work right, please, connect GND to the common ground point
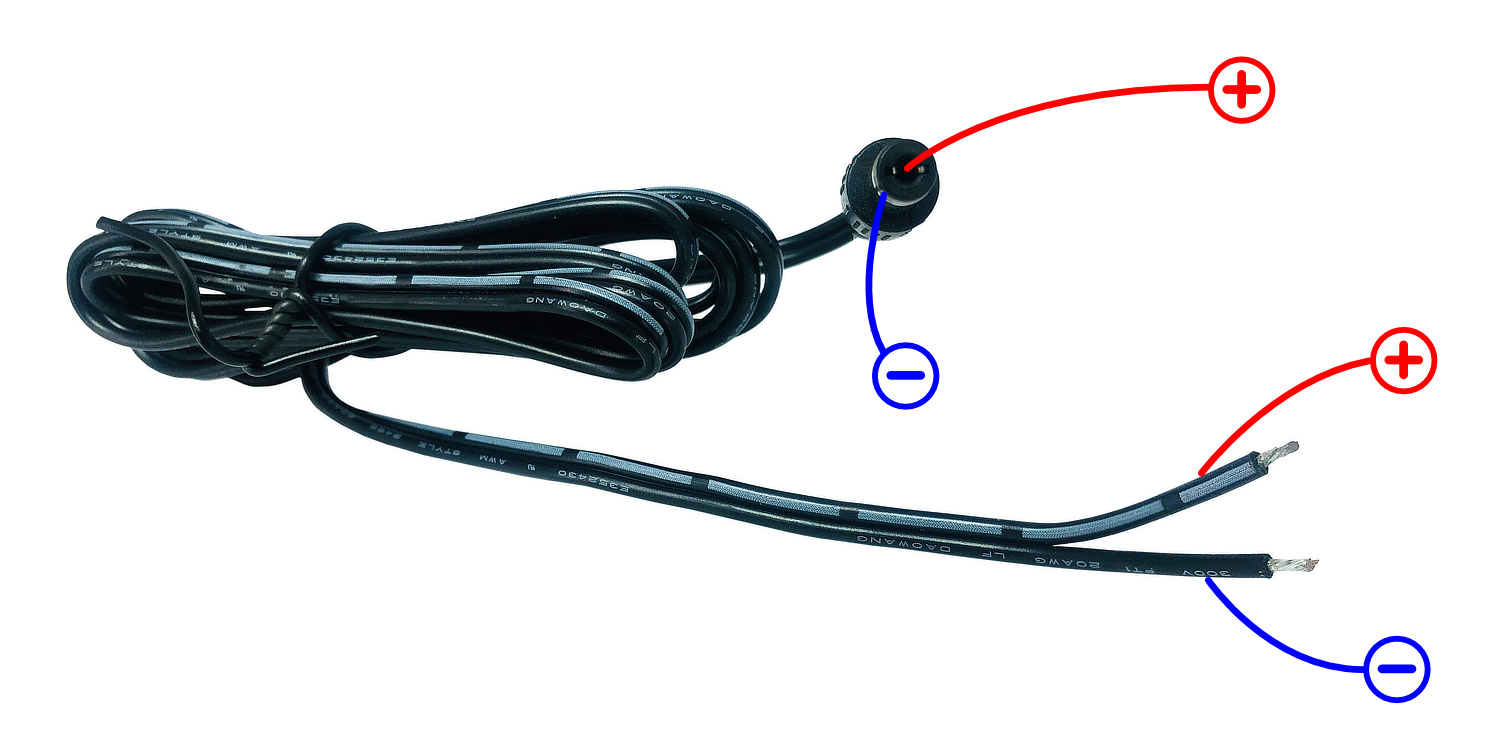
5. Power supply input DC
- DC 13.8 V input
6. USB - OTRSP/FW
- USB port - RFI filter, OTRSP protocol, FW upload
7. WIFI 2.4 GHz
- SMA for 2.4 GHz WiFi antenna
Parameters
- DC supply voltage: 13.8 V DC plug
- DC current supply: max. 1.5 A
- DC Vext supply: max. 26 V (pin 7 Vext + only for relay output)
- DC Vext current: max. 1 A (pin 7 Vext + only for relay output)
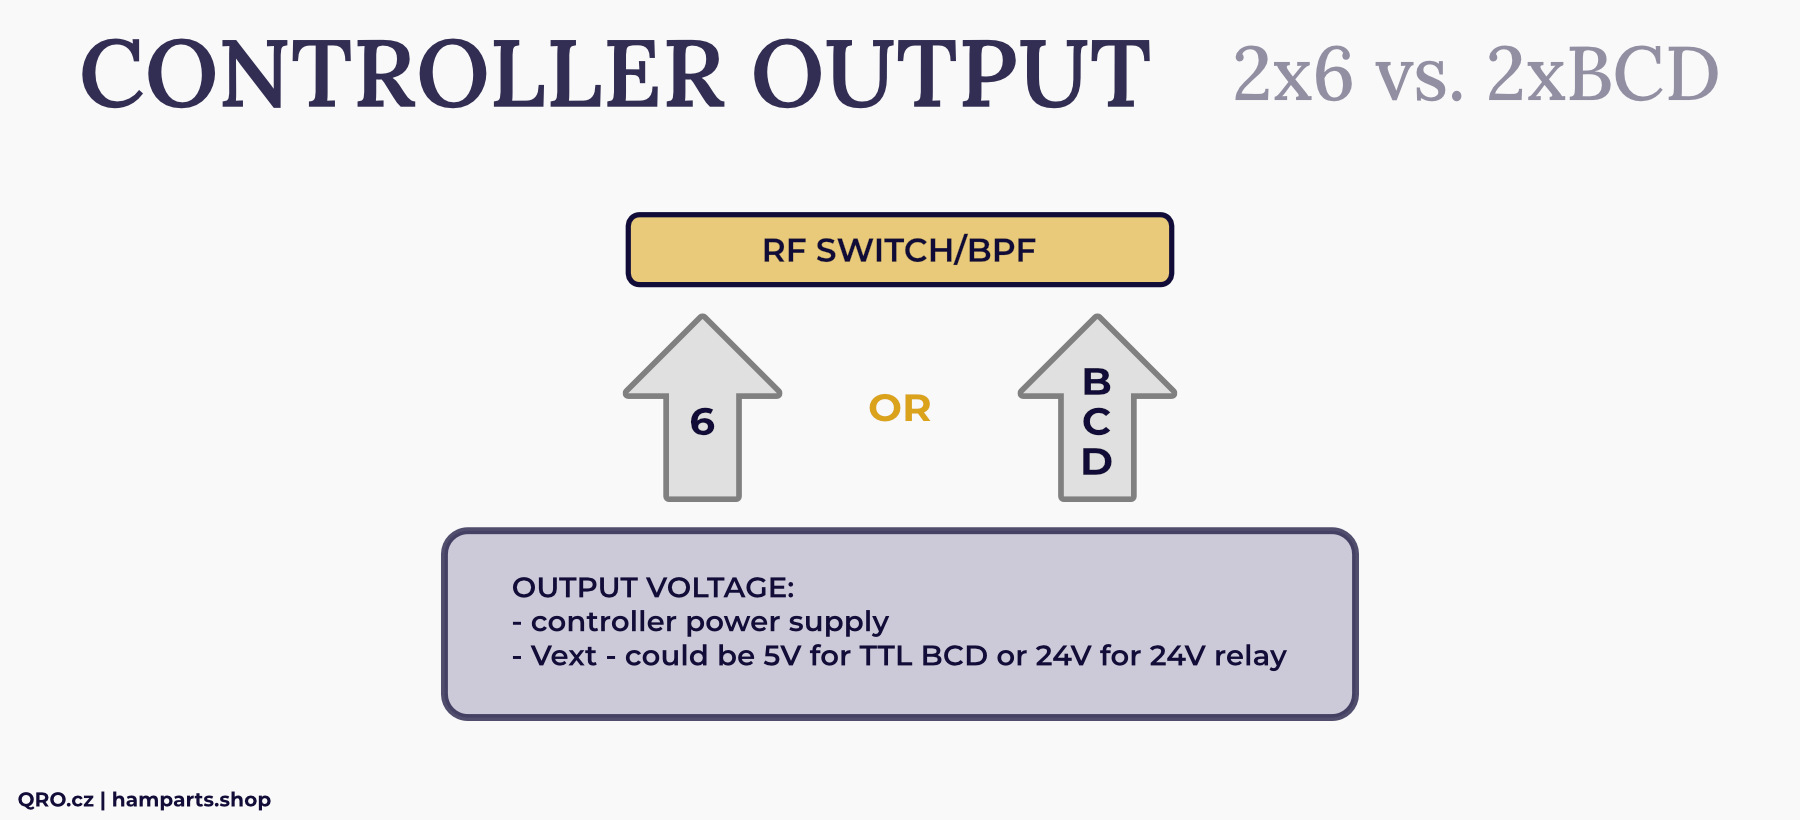
- Output is universal: +13.8 V or + EXT or to GND (depends on drivers and jumpers)
- Outputs 2x6 or BCD
- BCD output is DC supply voltage or Vext one
- Output current: max. 500mA per output, 500mA total/bank
- TBD driver is included
- Voltage drop for TBD driver: typ. 0.2V for +13.8 V input and 0.7 V including fuse
- Voltage drop for ULN driver: typ. 0.8V for +13.8 V input
- RFI filtered USB port, compatible with OTRSP protocol
- WiFi 2.4 GHz CLIENT with external antenna (SMA at rear panel)
- WiFi 2.4 GHz b/g/n compatible
- Web-based remote control
- WiFi SSID and password configuration by the WEB page
- PTT hot switch protection PTT (TX = GND)
- TRX A-B lock (first win) cannot set the same antenna
- USED LED and PTT IN/OUT protection while NO ANT or locked one
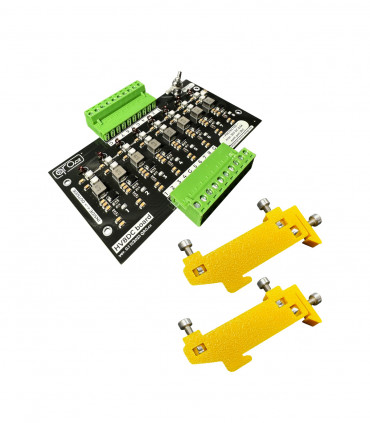
⚠ IMPORTANT NOTE: Default output setting is with TBD driver. Output control is +12V. If you need to control external devices by switching to ground, you must replace the driver with ULN and change the Jumper settings. ULN driver is NOT included. You can buy it here.
WiFi and Output configuration/set
You can switch WiFi ON and OFF and also outputs between classic 6x2 or the BCD by the front panel buttons while the controller is started up. If you do not use remote control, it is recommended to switch WiFi OFF.
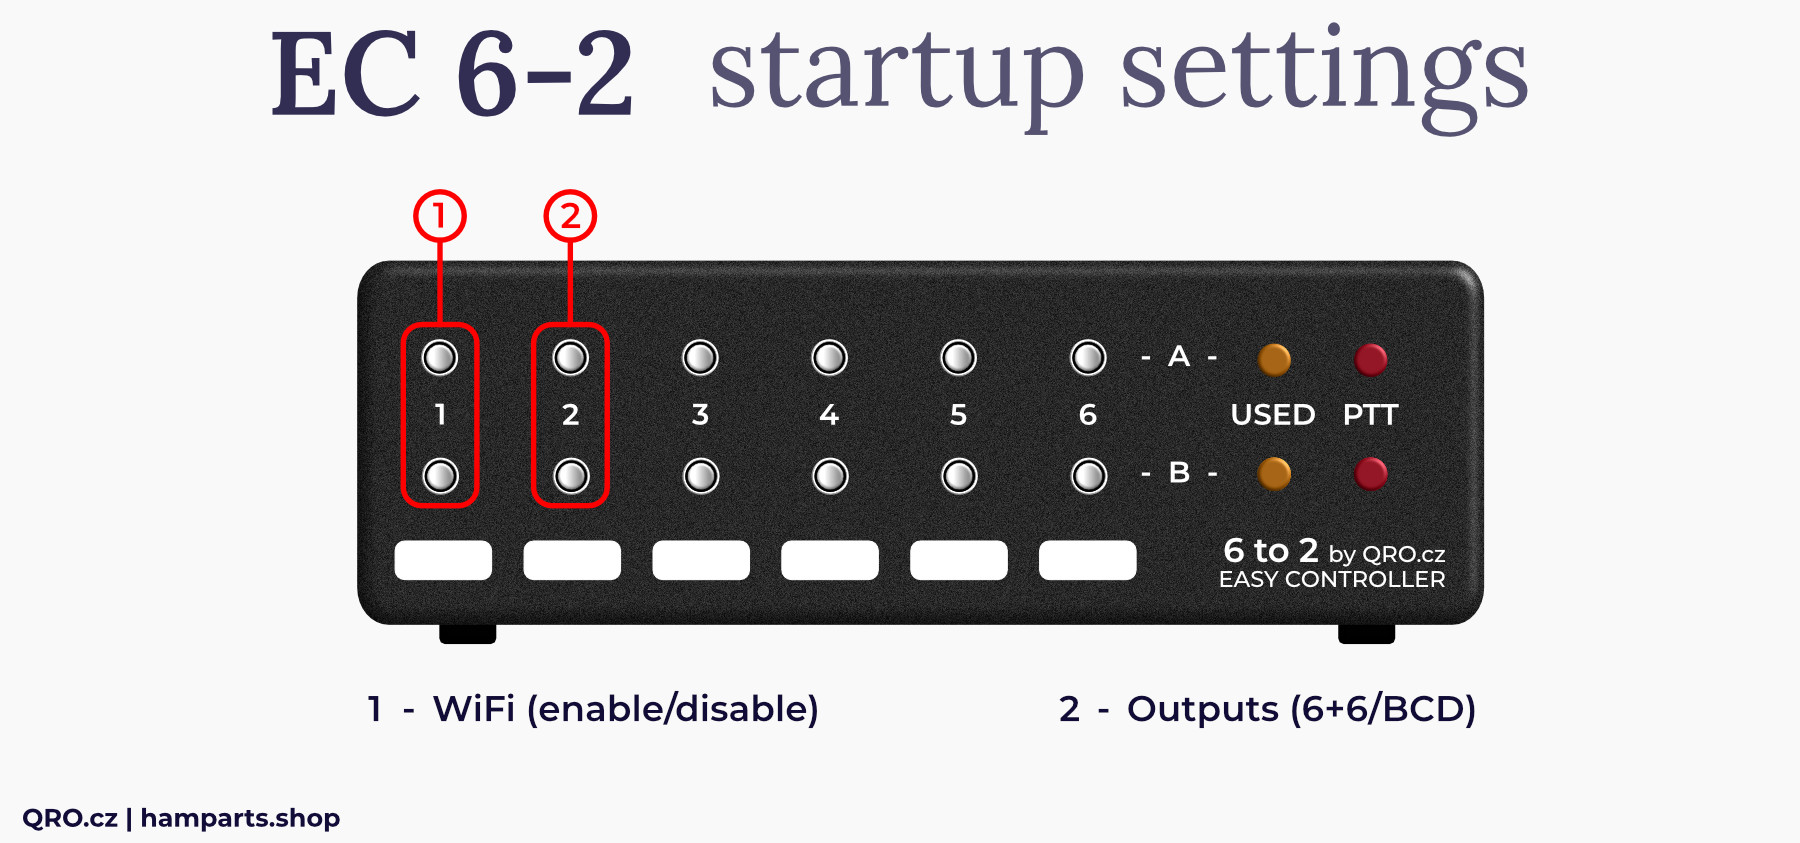
1. Buttons
- 1A = WiFi disabled
- 1B = WiFi enabled
3. Buttons
- 2A = Outputs A and B are BCD
- 2B = Outputs A and B are classic 6x2
If you like to change these settings, you have to:
- Disconnect controller from power supply
- Press and hold button you need (example: button 1A for disable WiFi)
- Hold the button and connect power supply
- Wait 5 seconds and release button
- Restart controller by disconnecting and connecting power supply
WiFi
There is 2.4 GHz WiFi client build-in. When you do not need remote web control, please disable it. When you like to use it, you need to enable it and setup AP SSID and password.
- When the WiFi is enabled and you switch ON the controller, you will hear relay clicking + LED blinking. It means that the controller is trying to connect to WiFi AP. If there is no WiFi configured or no AP available, controller tries it 20 times (20x clicking and LED blinking).
- When it fails to connect to WiFi, the client switches to AP mode and waits for configuration.
- You will find a WiFi called remoteAP now. Connect to it. Password will be: qrocz599
- Please, before the connecting we recommend to switch off another internet Connection at the device you would like to use for connecting. Like LTE at mobile device, LAN at notebook etc.
- If you managed to connect to remoteAP, open a web browser and go to: http://192.168.100.39:59/qroconfig?p=xxqro
- You will see a simple page SSID: and pwd: → use your credentials (Your WiFi settings - SSID (name) and password) and click on send.
- The correct answer of the server will be "Your wish is my command"
- Device is restarting and using you credentials. You should see/hear just 2-3 USED LED flashes/relay clicking and it will be connected to the WiFi (not 20 times any more)
- You can continue to Remote Control notes.
⚠ TIP: Resetting the user/pwd manually: http://<ip_address_of_your_switch>:59/qroconfig?p=xxqro&r=666
ℹ Example: You setup your Easy controller, it got the IP address 192.168.0.34.
To reset the pwd: http://192.168.0.34:59/qroconfig?p=xxqro&r=666.
If you change your wifi (or reset the pwd), the controller will always go into AP-Mode. So you need to bring your wifi back or give the controller new credentials.
If you ever need to reset your pwd when the controller is in AP-Mode: http://192.168.100.39:59/qroconfig?p=xxqro&r=666
⚠ Due to WiFi manager limitions, it is not possible to use a password that contains special characters. Only numbers and letters can be used.
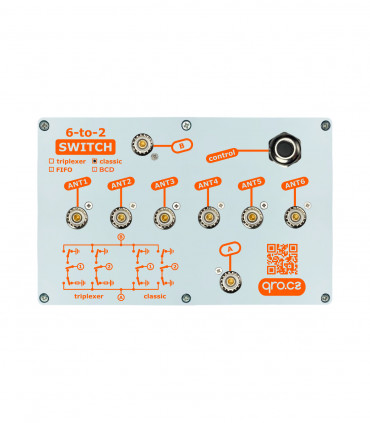
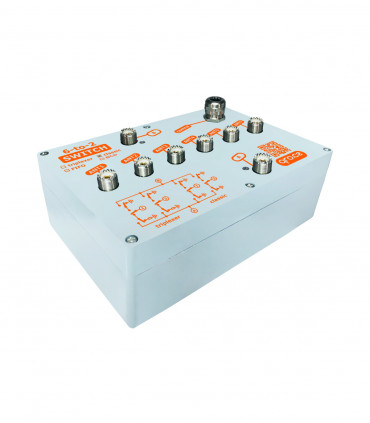
Output connectors description
There are three output connectors where you can connect antenna switch (band pass filters etc.). DB15 and both RJ45 are almost the same. You can buy RJ45 LAN cable all over the world, what is big advantage. DB15 has got possibility to apply external supply voltage - in the case you use relays with different voltage from 12V DC or BCD output with TTL logic (Vext = 5 V).
Controller also allows to use positive DC voltage out or switching outputs to the ground. Our 6-to-2 (six-2-two) RF switches need +12 V to switch ports on. If you have your own one with different relay voltage (24 V), you can connect this different voltage (24 V) to Vext PIN (7 at DB15) and change jumper settings in the controller. If you have your own switch with activating relays to ground, you have to change internal drivers and set the jumpers to the right position. You can find more info in this manual.
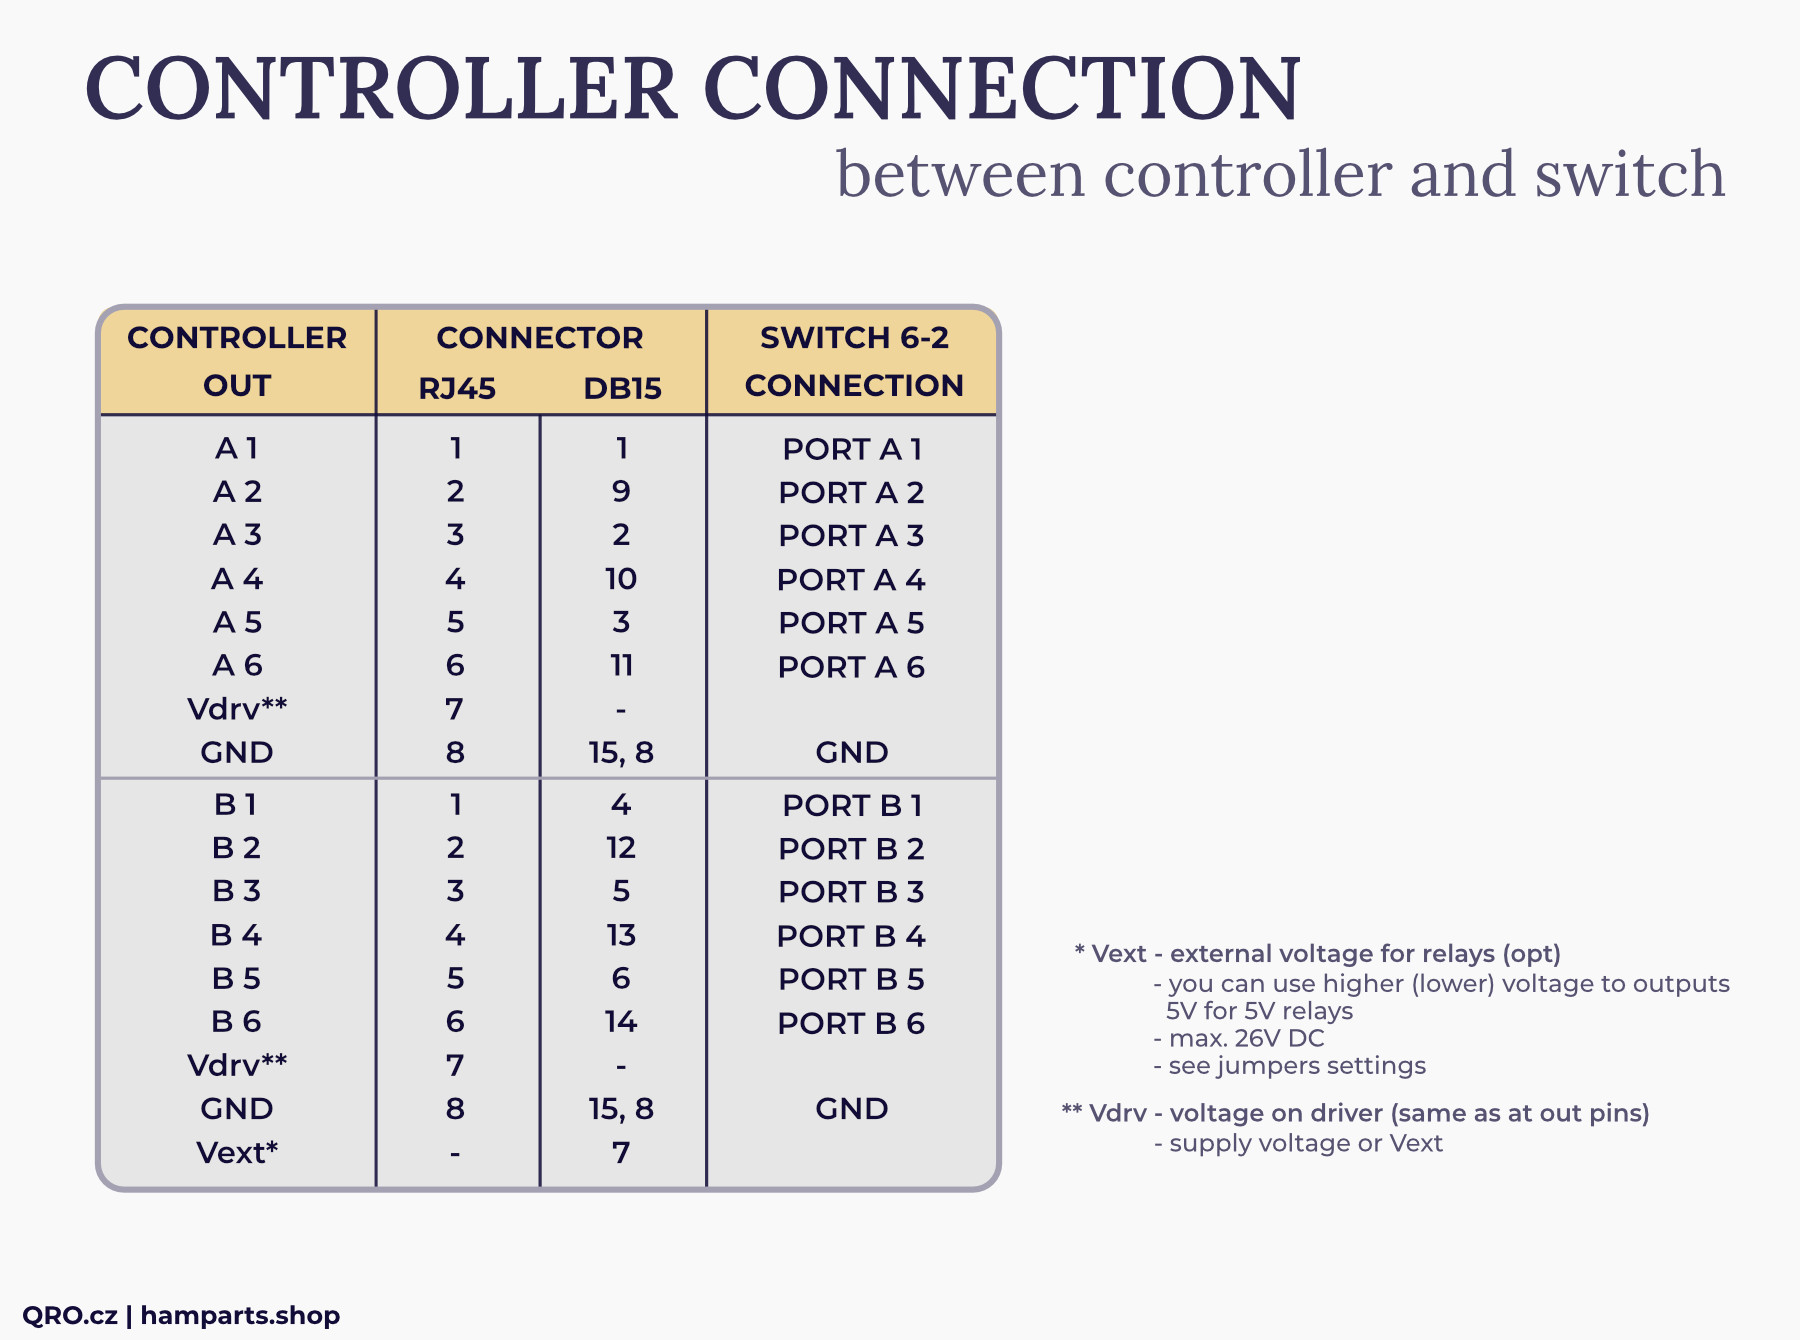
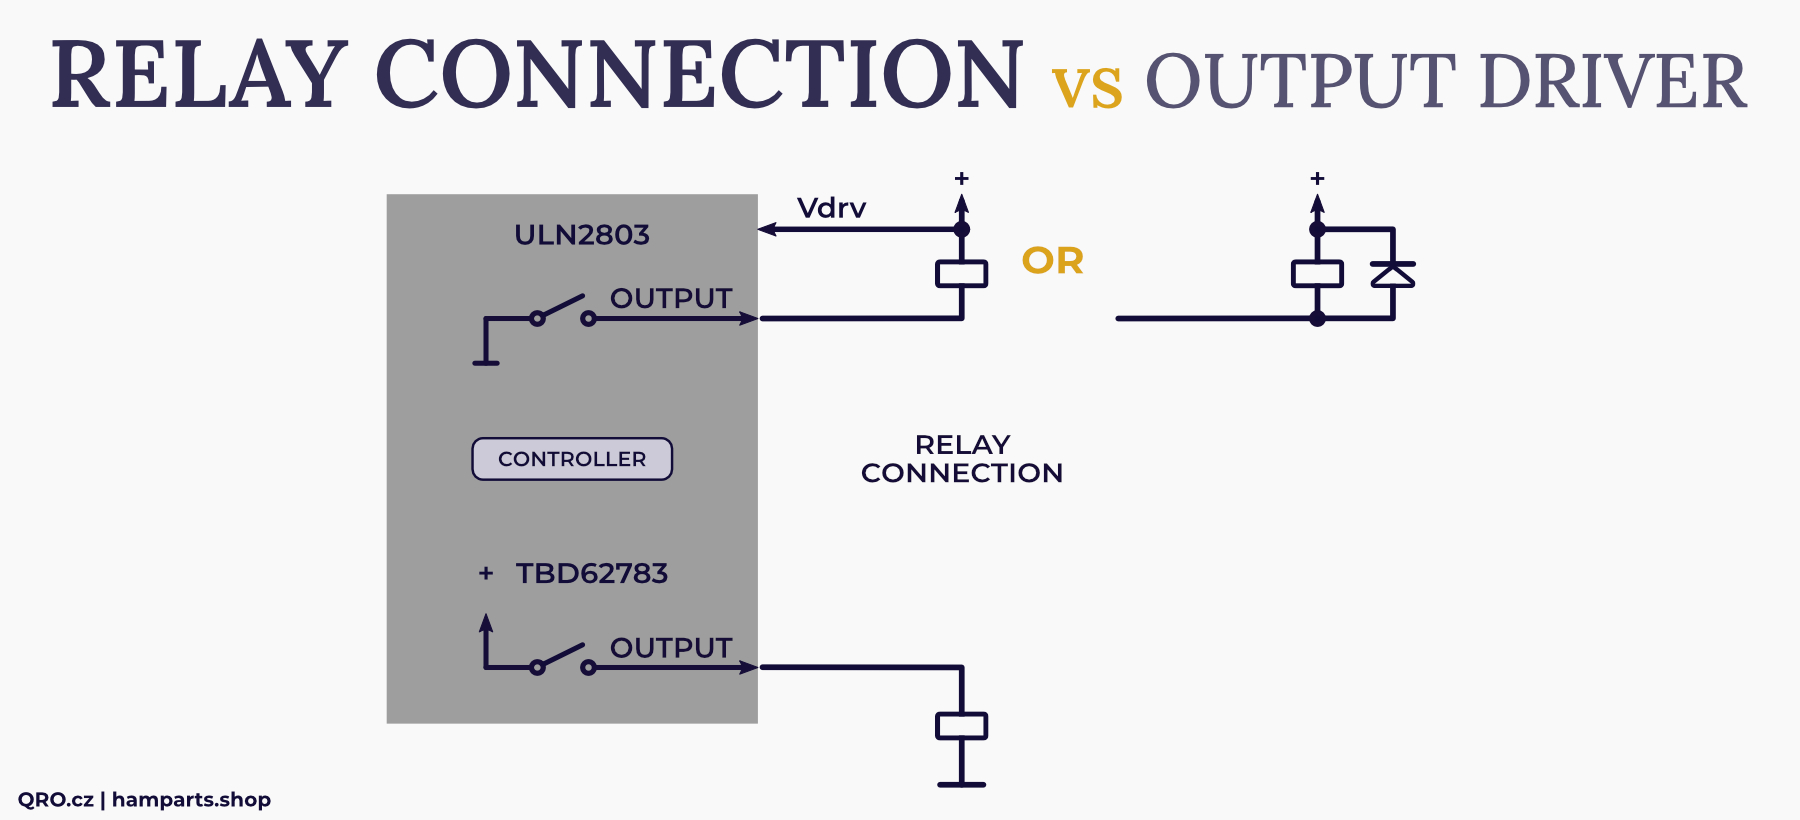
OUTPUTS = outputs pins to RF switch. Could be +12 V (or Vext) or to ground - depends on driver inside.
Vext = External voltage input. You can use this when you use relays with different voltage from +12 V.
Vdrv = voltage at driver. Connect it to the supply voltage of relays when you use switching to ground - this enables internal protection diodes in the output driver.
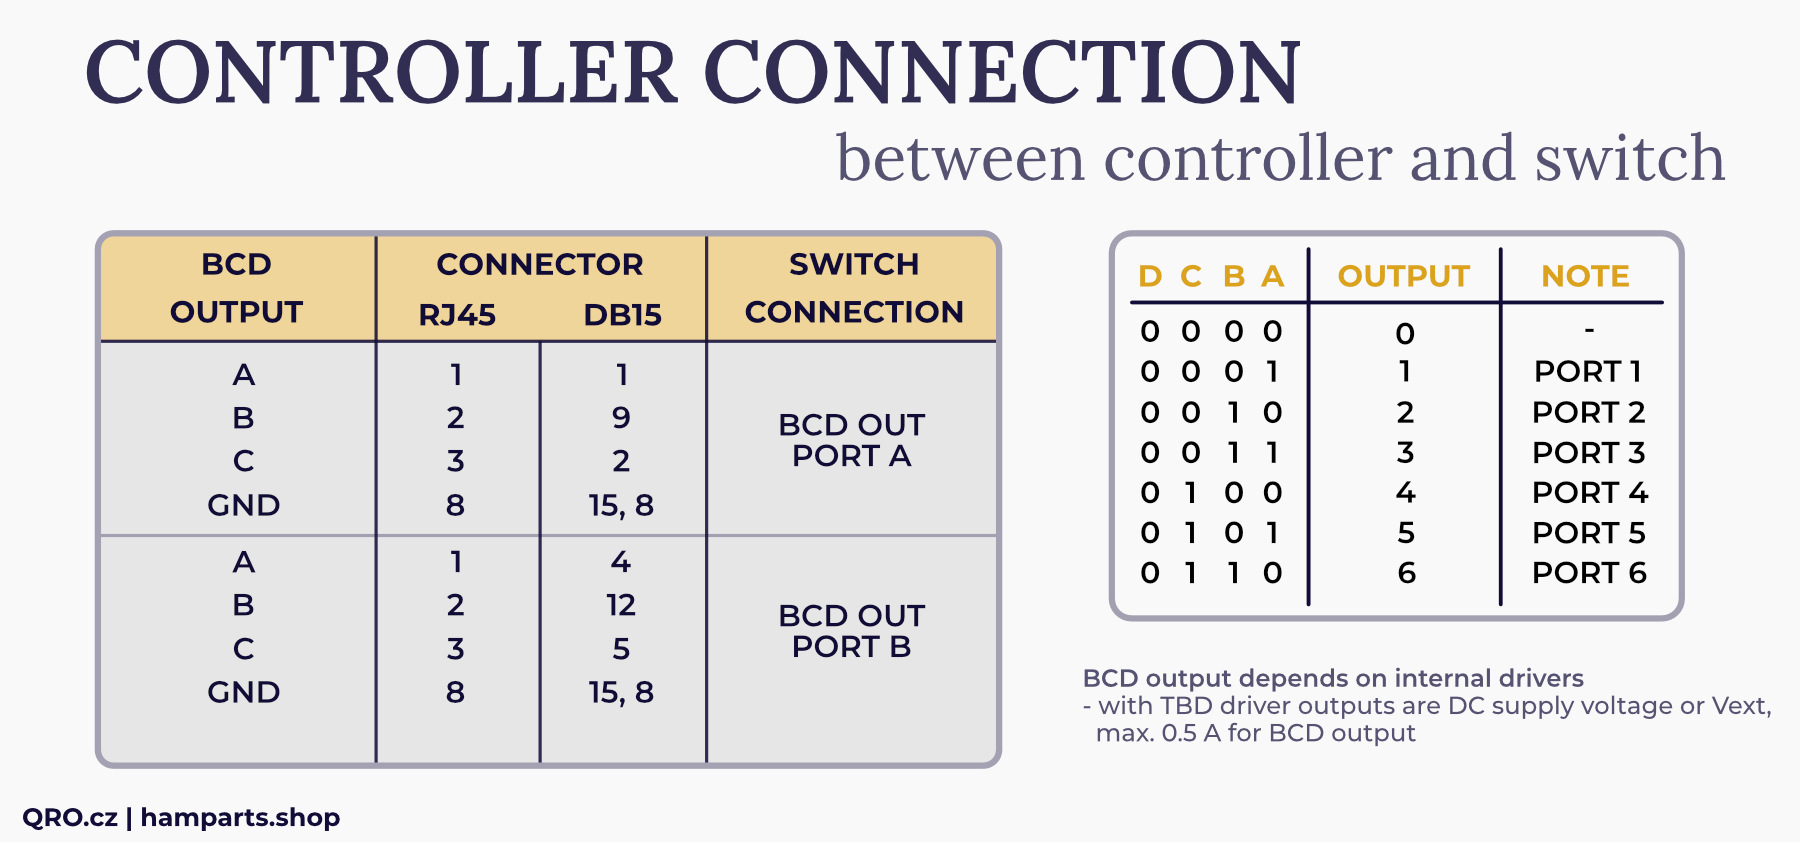
BCD OUTPUTS. Following BCD matrix table. Output could be again supply voltage, Vext (24 V or 5 V for TTL BCD output) or switching to ground.
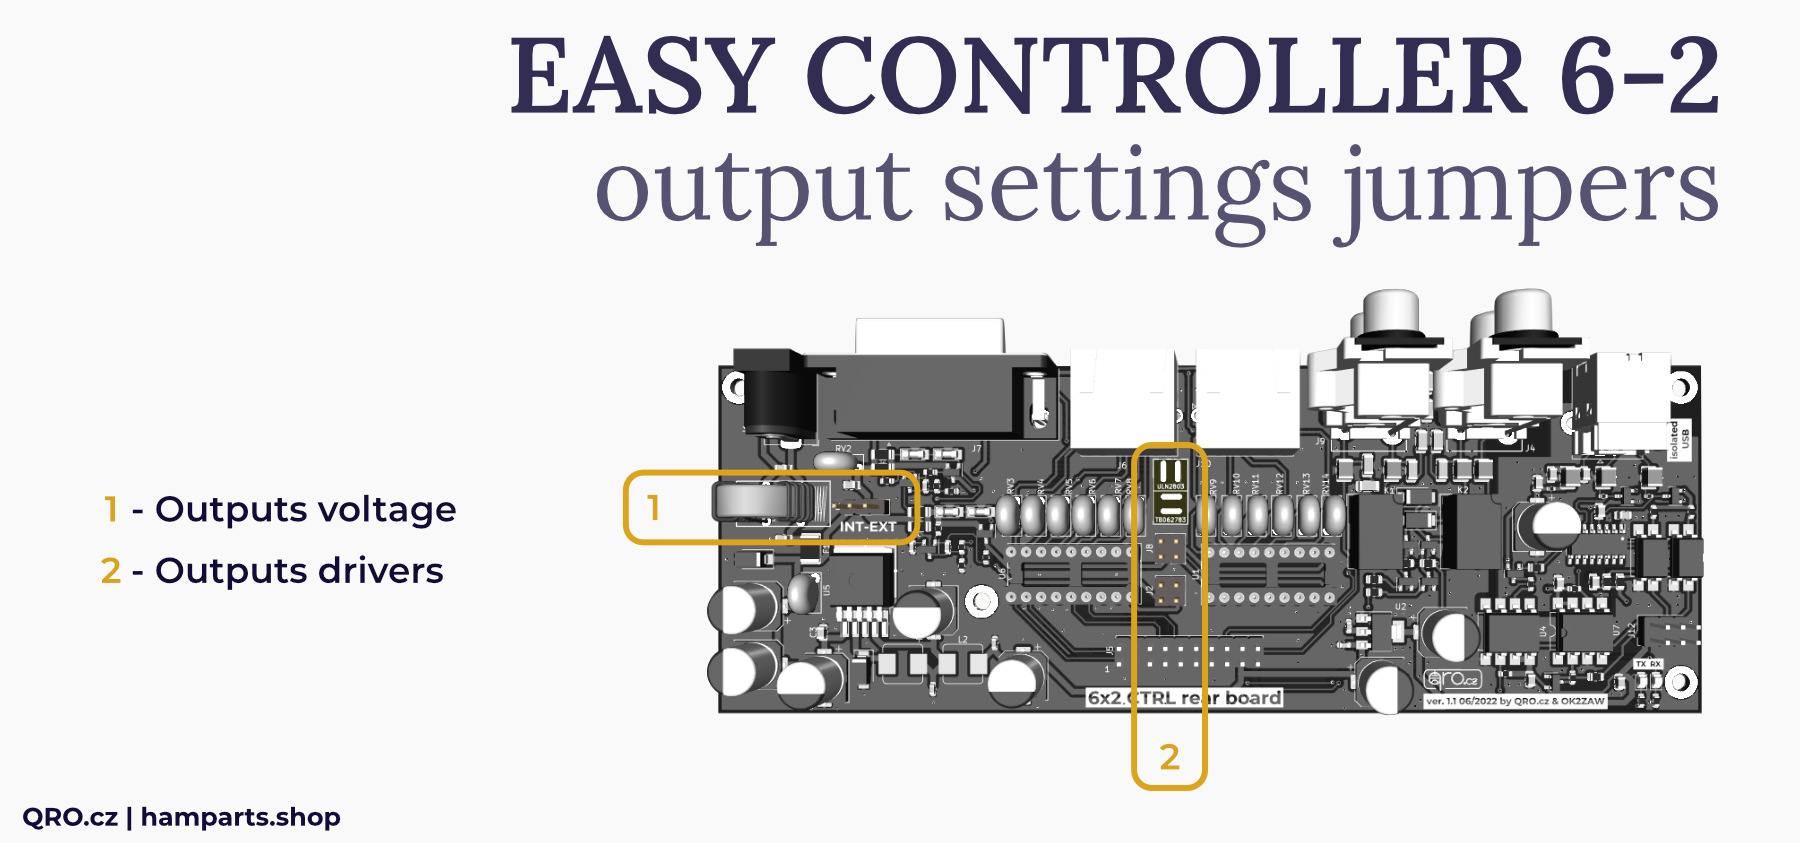
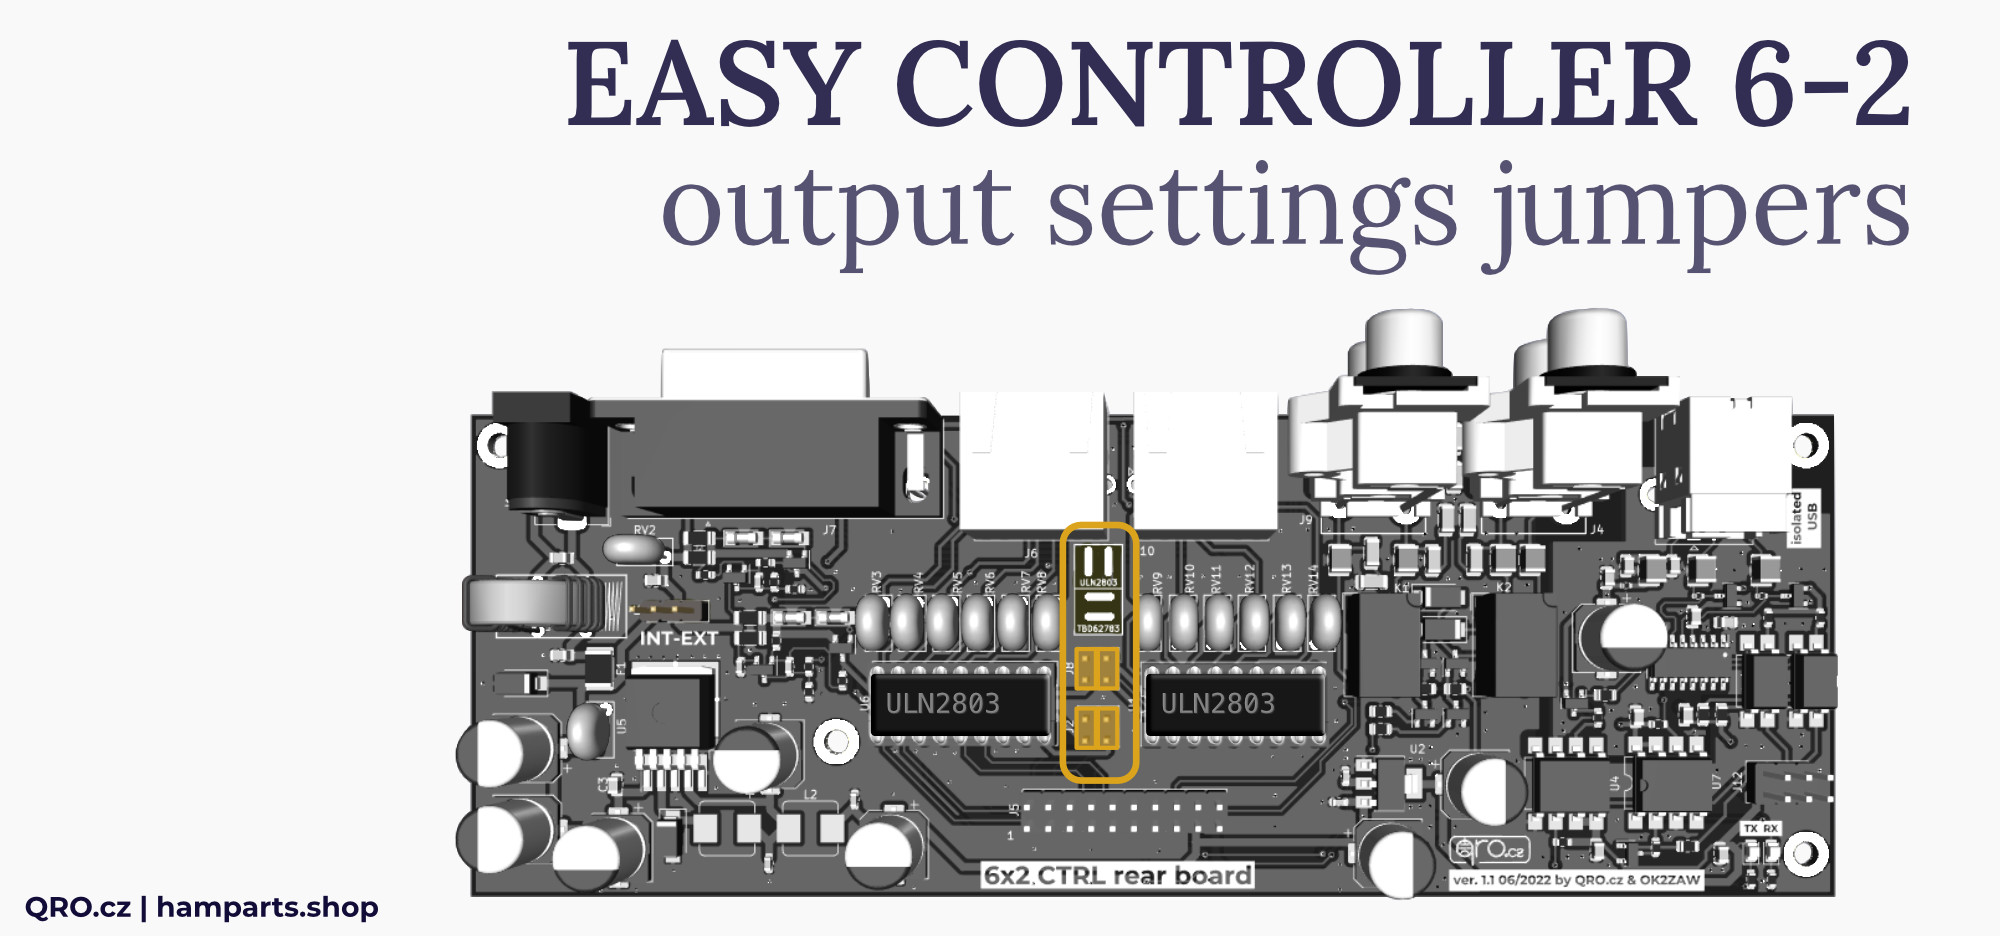
Output driver settings
⚠ IMPORTANT NOTE: PLEASE, before you change the settings, you need to change the output driver and jumper settings. This can only be changed when the controller is switched off. Never turn on the controller when you have the opposite jumper and output driver settings.
Outputs for switch control are universal. Output can be either + supply voltage, +Vext voltage or switching to ground. Either 2x6 or BCD.

PTT IN and OUT
PTT is very important thing there. Controller has got PTT HOT switch protection - when PTT is in transmitting, you are not able to switch port. Web User Interface does have PTT indicator too.
There are relay contacts between PTT IN and OUT. When the controller is switched OFF, PTT OUT is disconnected from IN. The same when NO port is selected. PTT IN and OUT is connected together only when any port is selected (PTT A and bank A, PTT B for bank B). This is protection between TRX and PA where the PA is keyed only when some antenna is selected.
Principle of USED LED
LED indicator USED is connected with PTT control. When LED USED is ON, PTT OUT is disconnected from PTT IN. This is protection for PA - NO antenna connected = PA does not have PTT.
You can switch off all ports for bank A or B by pressing any button two times. Also, if there is NO Band assigned to a port in OTRSP, the controller unassigns the last selected port and illuminated the USED LED. It also disconnects the PTT input to output. Web based User Interface does have the same function as classic buttons at the controller.
There is no feedback from controller to the OTRSP and logging software (only one way communication). In this case USED is a protection against selecting the same antenna port at both TRX (A and B). There is the First Win, but when you select some port by the web UI or button and then the logging software has no idea about it. This is a protection that disconnects the PTT OUT in case the same port that is already used by the first TRX is selected.
OTRSP - USB protocol for SO2R
The Open Two Radio Switching Protocol (OTRSP) is a simple set of commands and events for computer control of a Single Operator Two Radio (SO2R) device.
Link: https://www.k1xm.org/OTRSP/
There, the controller does have only one way communication - listens to commands from the PC.
⚠ NOTE: If the Band is not assigned to a port, the controller unassigns the last selected port and illuminates the USED LED. It also disconnects the PTT input to output.
You can use this protocol for automatic control from a logging program (N1MM, DX log, Win-test, etc.). For proper operation you must connect a USB cable between the controller and PC. You need to find the correct assigned port number in the PC - com port name: USB-SERIAL CH340 and number.
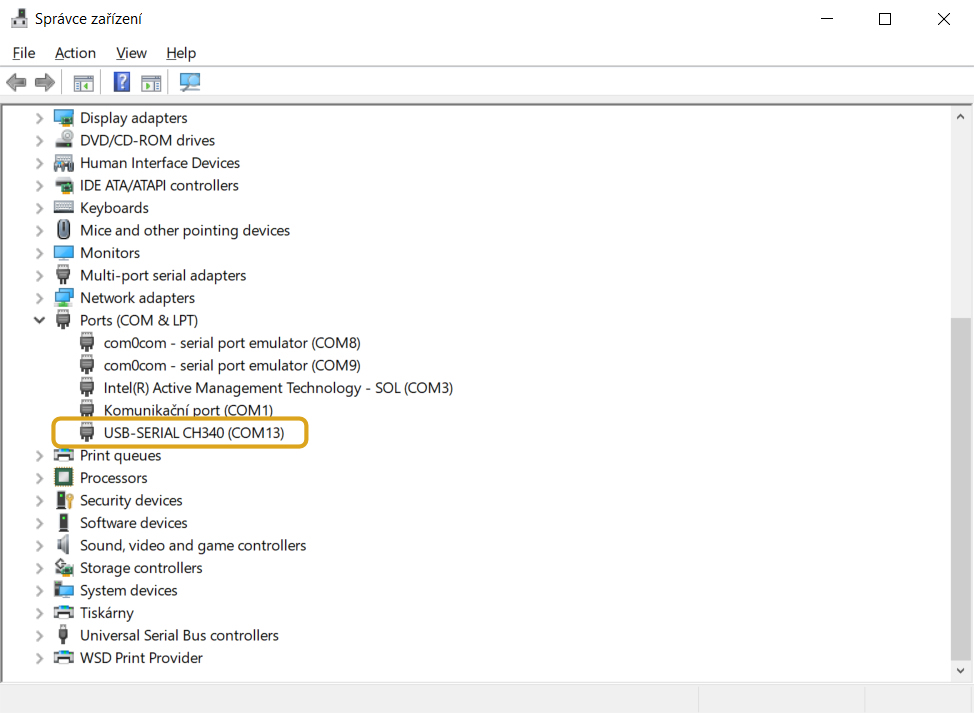
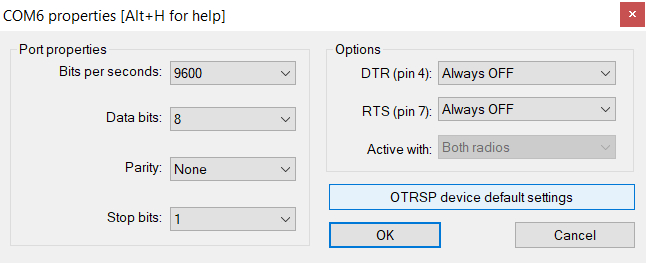
Then set this port number in the logging program. The default setting is SPEED 9600 and 8N1.
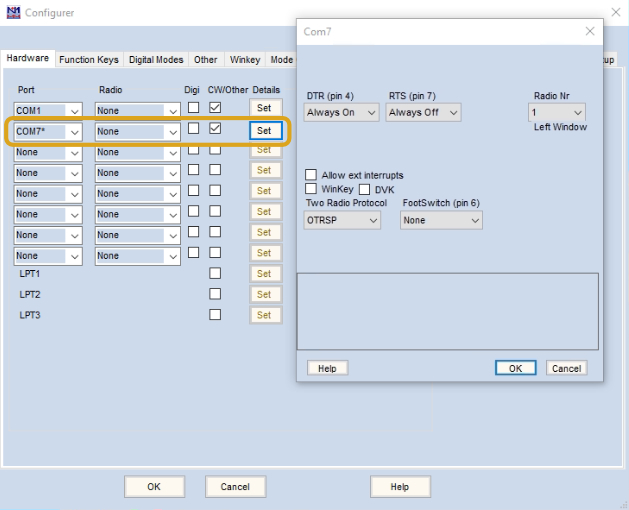
N1MM software:
- Go to configuration, select the correct port number
- check CW/Other and open Set
- Under Two Radio Protocol, select OTRSP
- The other settings depend on your configuration - for example Radio Nr. 2 for S02R
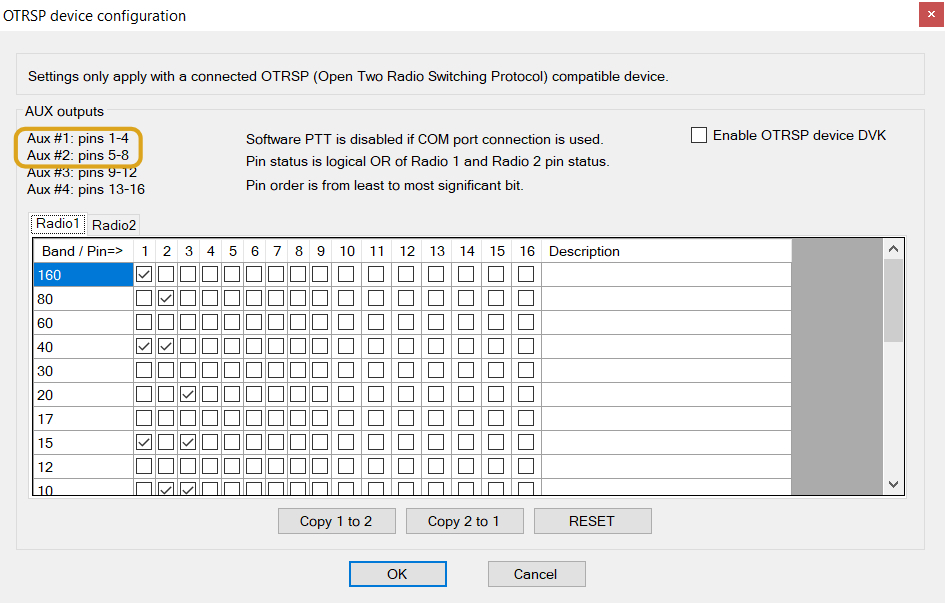
In the Configured window, select the Antenna tab.
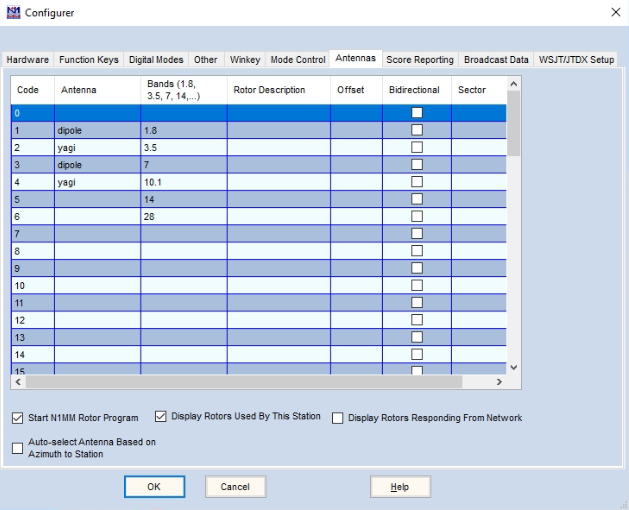
Here the Code means the number of the button on the controller (1 to 6), Antenna is the name used in N1MM and Band is the frequency band used for the button at controller = ports at antenna switch. In this example: 160m band will select port 1 (button 1) at controller. 10m port 6 etc.
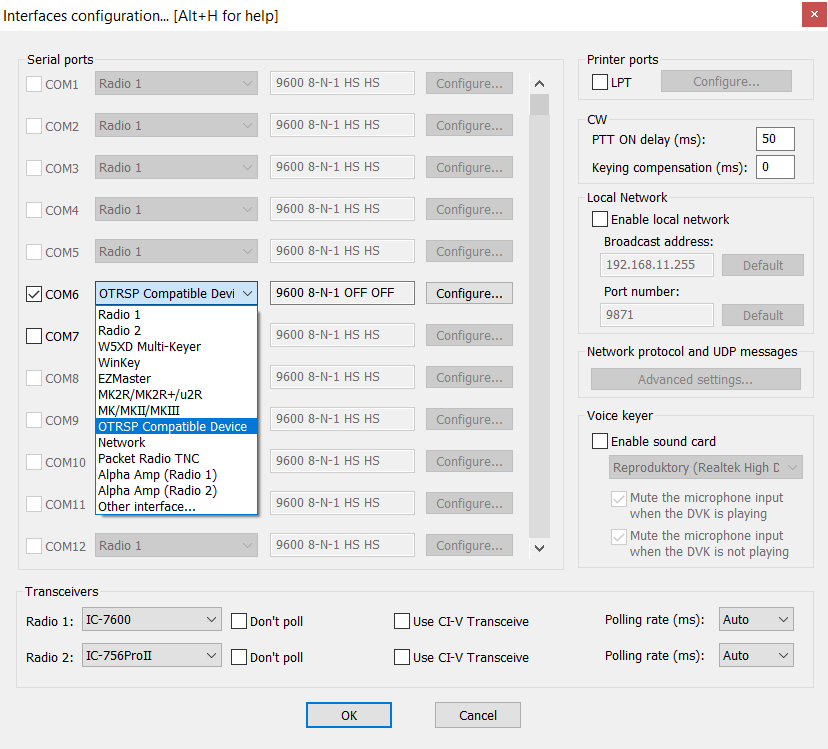
Win-test of DX log software:
- The procedure for these loggers is similar to N1MM. In the configuration you have to select the correct com port and OTRSP protocol
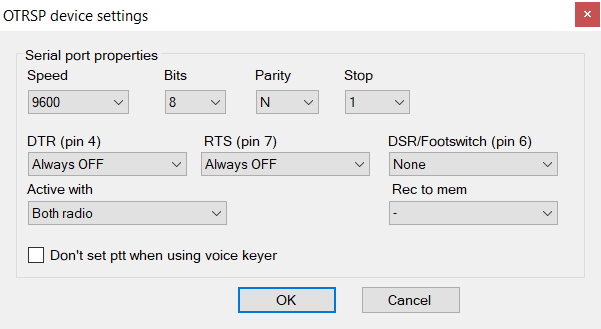
Either use the default settings button or manually set the OTRSP to 9600 8 N 1.
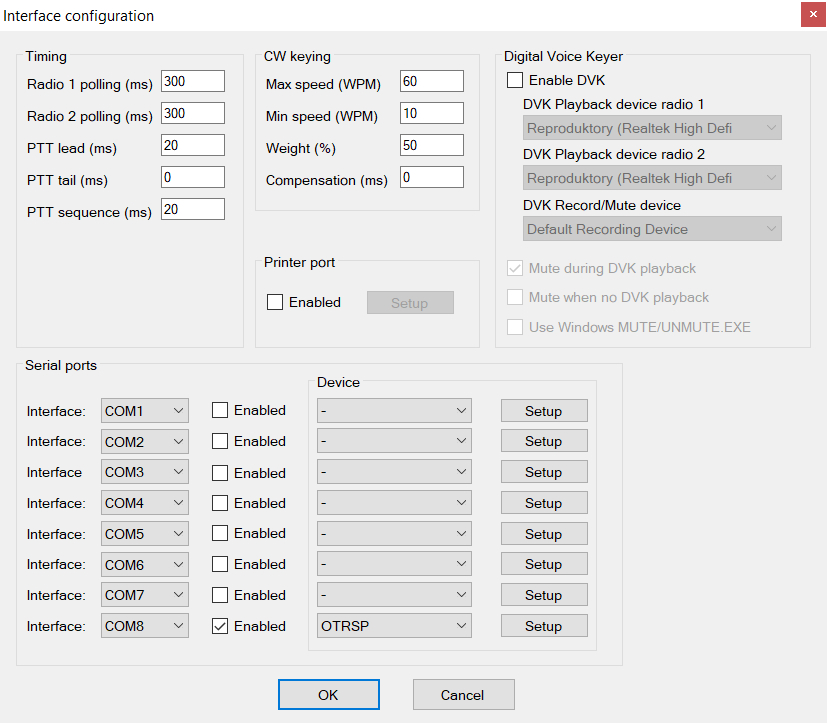
The difference from N1MM is the configuration of the antenna port number and the appropriate band. Win-test and DX log use bit code interpretation.
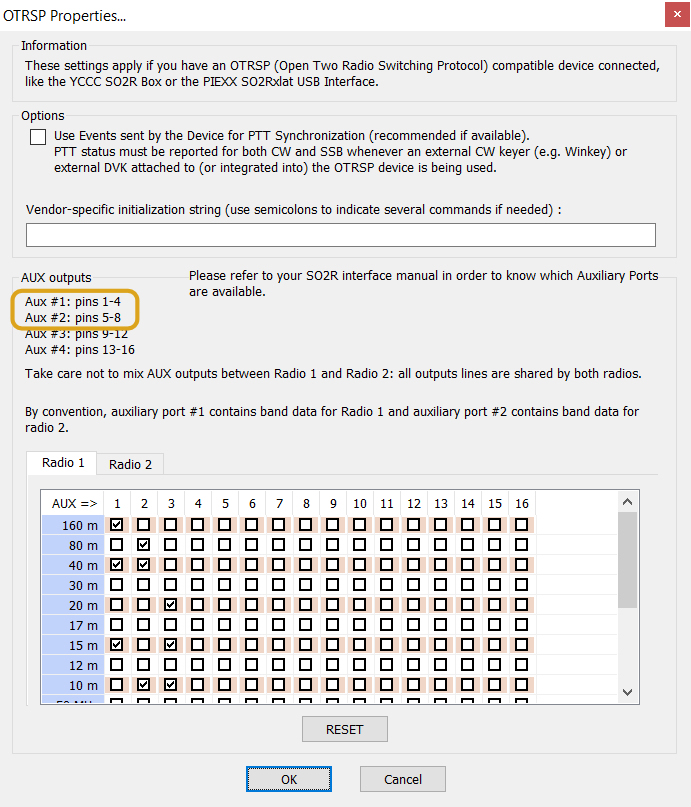
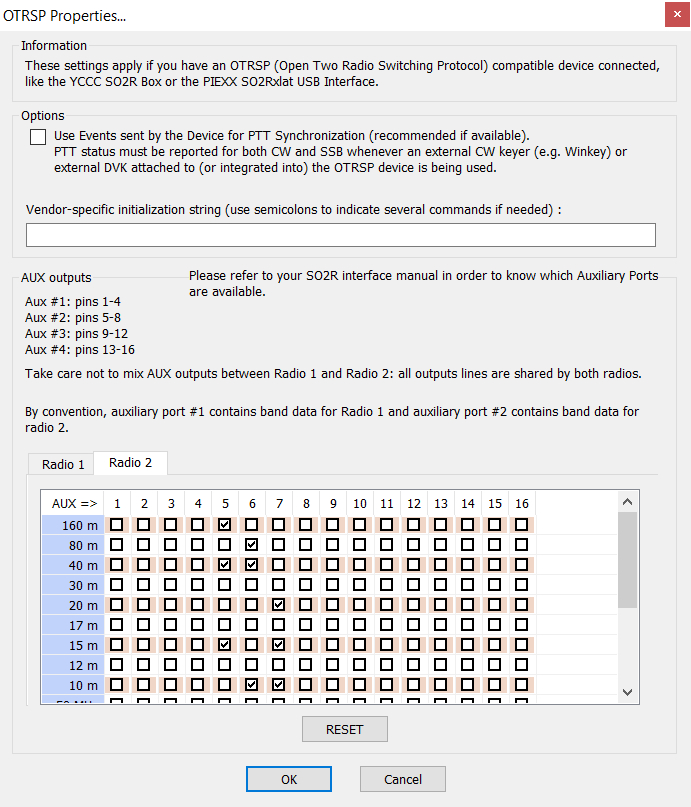
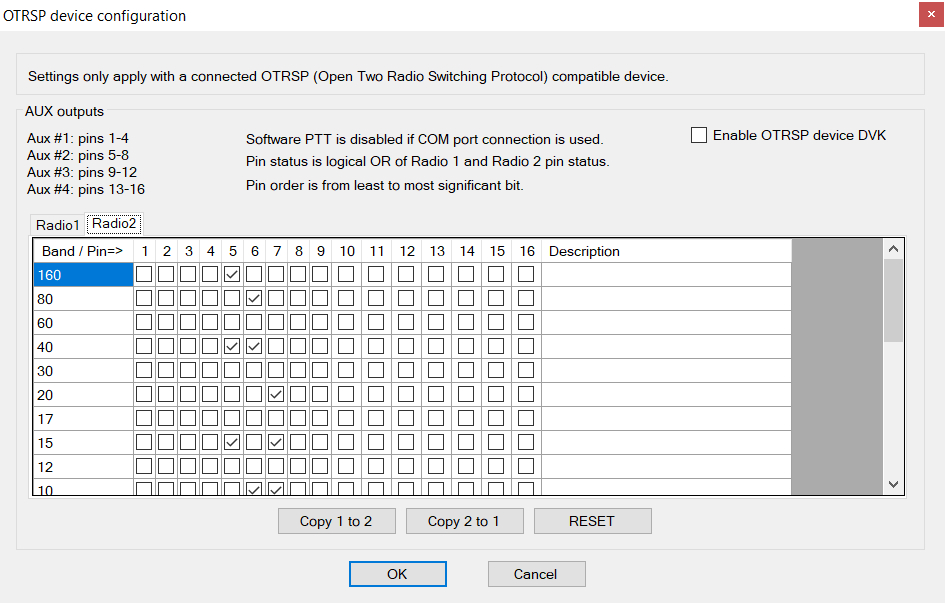
Where Pin numbers are bit number for each TRX: pin 1 to 4 are 4 bits for TRX A (AUX1) and bits 5 to 8 for TRX B (AUX2).
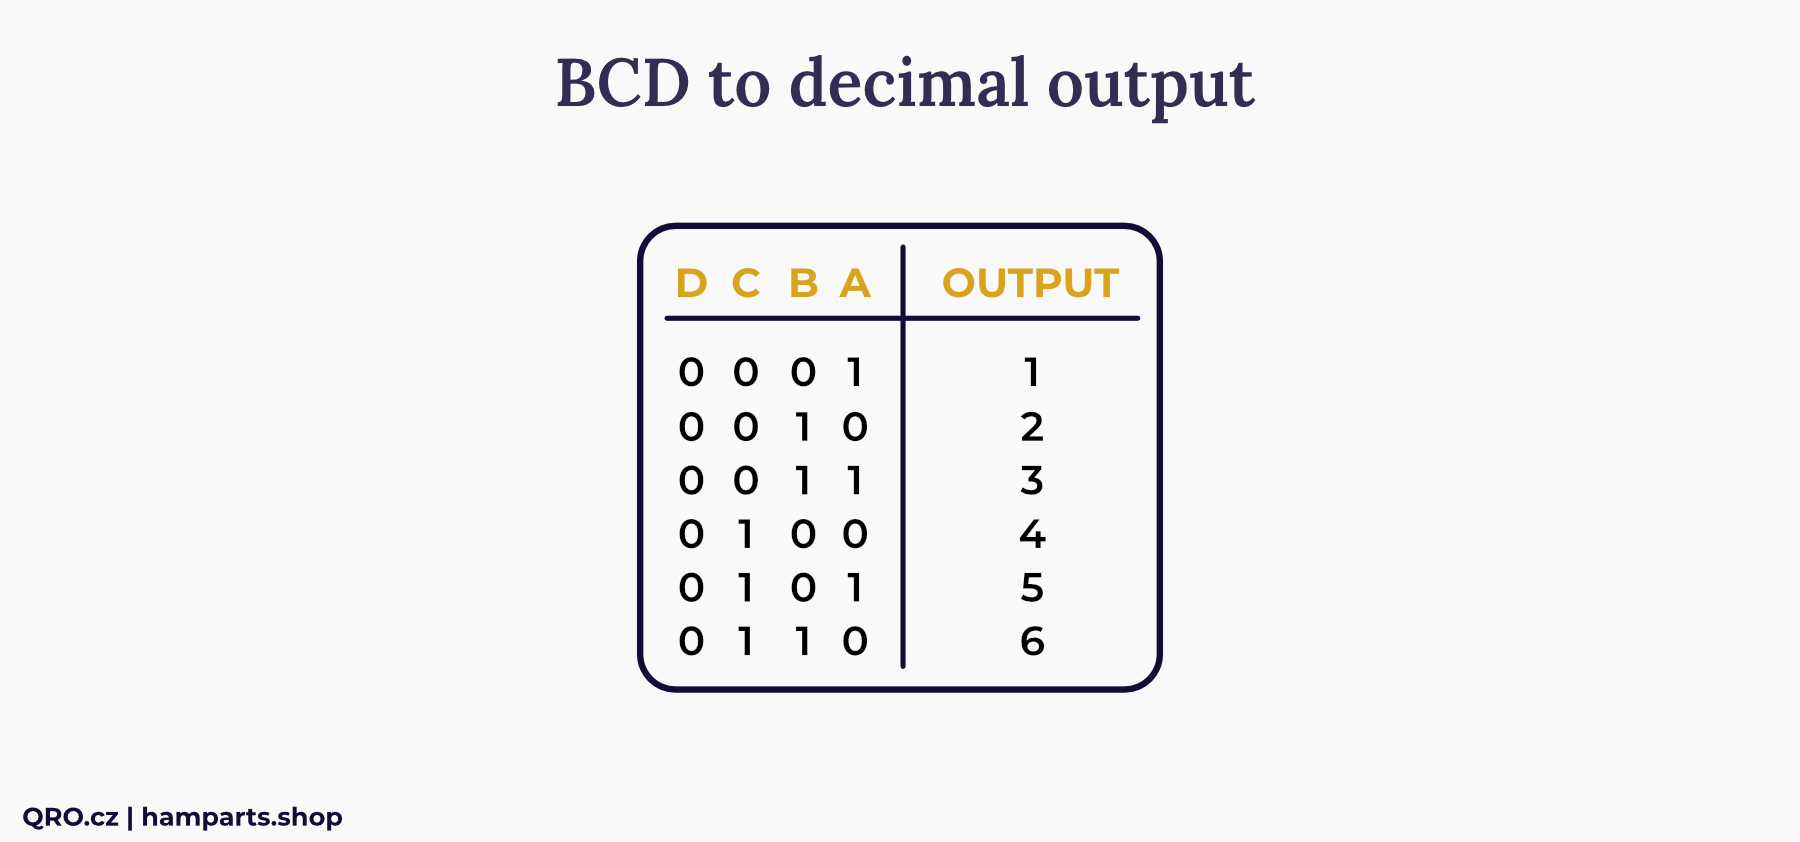
Where bit A in table is pin 1, B pin 2 etc. For TRX B it is A = pin 5, B = pin 6 etc.
Example: controller/antenna port 4 will be 0 0 1 0, pin1 = 0, pin2 = 0, pin3 = 1, pin4 = 0
You can use any band to any output - as you need.
Remote Control
There is WiFi 2.4 GHz client in the controller. You have to set up WiFi Connection to your WiFi AP (router). Remote control is based on web page with User Interface (UI) looking like front panel of the Easy Controller. You are able to change buttons labels, color, size etc.
QUICK setup
Mike DM5XX has prepared Entry Point and Easy Assistant pages. This is the best way to go, see all possibilities of our UIs.
Please, start with ENTRY POINT manual page
QUICK UI setup link is there: EASY ASSIST
Please, follow our YouTube channel
⚠ IMPORTANT NOTE: We recommend a VPN while using remote access from outside your network in general.
QUICK setup manual way
1. Find IP address of the controller in your LAN
2. Open link in your web browser (select right one by the controller version
- 6-2 controller: http://logic.qro.cz/logic/EasyControl/index6by2.html
3. You should see web UI. Please, close warning with Websocket error (you have to set right IP address)
4. Open config and fill in your controller's IP address
5. Press update
6. You can update all you need as ANT name, font size etc. Again, press update button
7. Go to bottom of the page and press Generate link
8. Press Open from link - you will have new window with updated parameters which should work and you can control the controller
9. Save this link somewhere - you can use it from any device in LAN
10. Good to know
- Take care that your link starts with "http://" (not https! Some Browsers like Chrome add this automatically)
- If you changed something on the config page, please always press "update" on that Field. Create link after you completed everything
- Always use VPN. Never use and trust Portforwarding. Please see:
https://uk.pcmag.com/vpn/93737/how-to-set-up-and-use-a-vpn or
https://www.hellotech.com/guide/for/how-to-port-forward
- Ask a friend who has knowledge of setting up VPN (or Portforwarding). Since this is specific to your router or internet setup, we cannot help you there a lot.
Controller IP address
This controller is configured as DHCP client - looking for IP address from DHCP server (usually your home internet router).
At first, you have to find IP address of your device. There are more ways how to do it:
1. Find IP in your router:
- log in to your router and look at DHCP leases table (Host Name should be Impero)
2. IP addresses scanner software:
- use any IP address scanner software, for example Advanced Port Scanner
There you should be able to find IP address with Port 59 - this is your device

Access to web User Interface (UI)
There is web UI a tour server which is called by your browser. The advantage is that you don't have to do any updates. We do it for you and you just use your web browser to call up the latest version.
There are two ways to call web User Iterface:
1. Use UI files from our server
When your router allows it, you can try:
http://sixbytwo.local:59/index?customizeurl=logic.qro.cz/logic/Manager/6by2_v2/&jsurl=logic.qro.cz/logic/Manager/6by2_v2/rl/
2. Direct call of the controller IP (in local network)
http://logic.qro.cz/logic/EasyControl/index6by2.html?id=qro.cz&ip=IP%3Aport
where IP is address of the controller and port (default 59).
example: example:http://logic.qro.cz/logic/EasyControl/index6by2.html?id=qro.cz&ip=192.168.198.176%3A59
You can also call just the web UI and configure IP address in the configuration part:
http://logic.qro.cz/logic/EasyControl/index6by2.html
IP access to the UI
There are more ways to access to the UI web page.
1. Only LAN network
When you are only in your local LAN network - controller and devices which control it - then you can use only your local IP address which you have find before (like 192.168.99.54:59 etc.).
2. Controller in local network - access from internet
The controller is in local network and you would like to access to it from internet.
Not secure way is Port Forwarding done in your router. You have to have Public IP address on it! Please, have a look at your router manual and set port forwarding. You have to set: public port at your public IP address to local IP address and local port (like 192.168.99.54 port 59 in our example).
3. VPN
Security way is VPN - this is question of your router and another home network/PC/tablet/mobile phone. Secured VPN is highly recommended for most access to your local network.
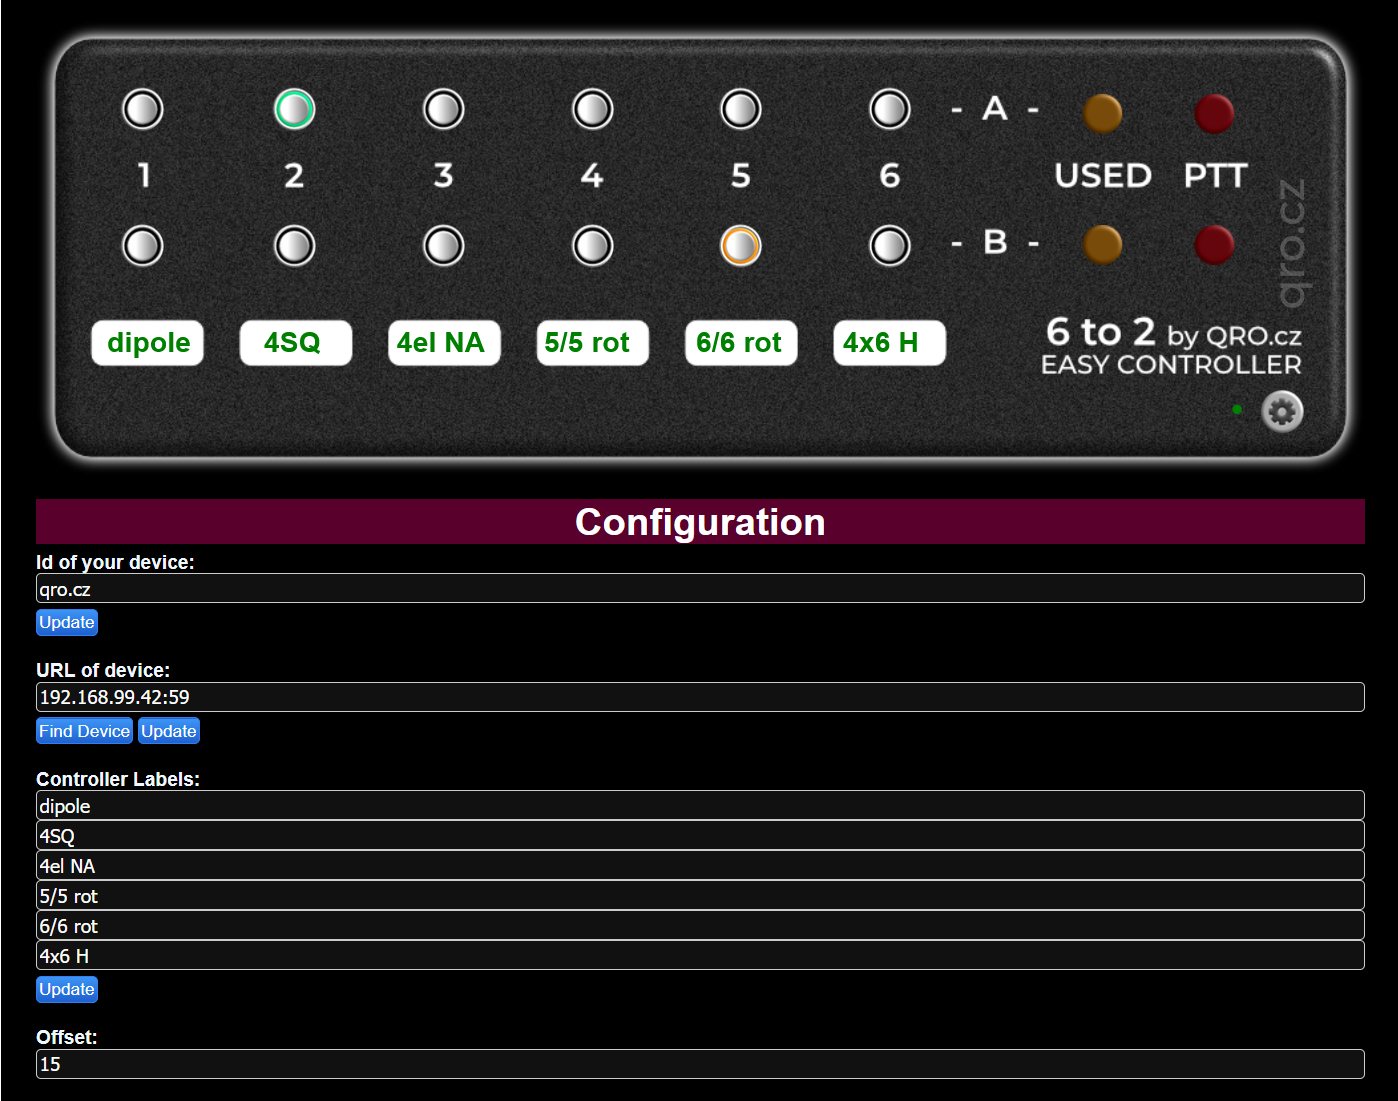
Configuration page
This is configuration web page where you can set ID, IP address, Labels, font size, color and port parameters.
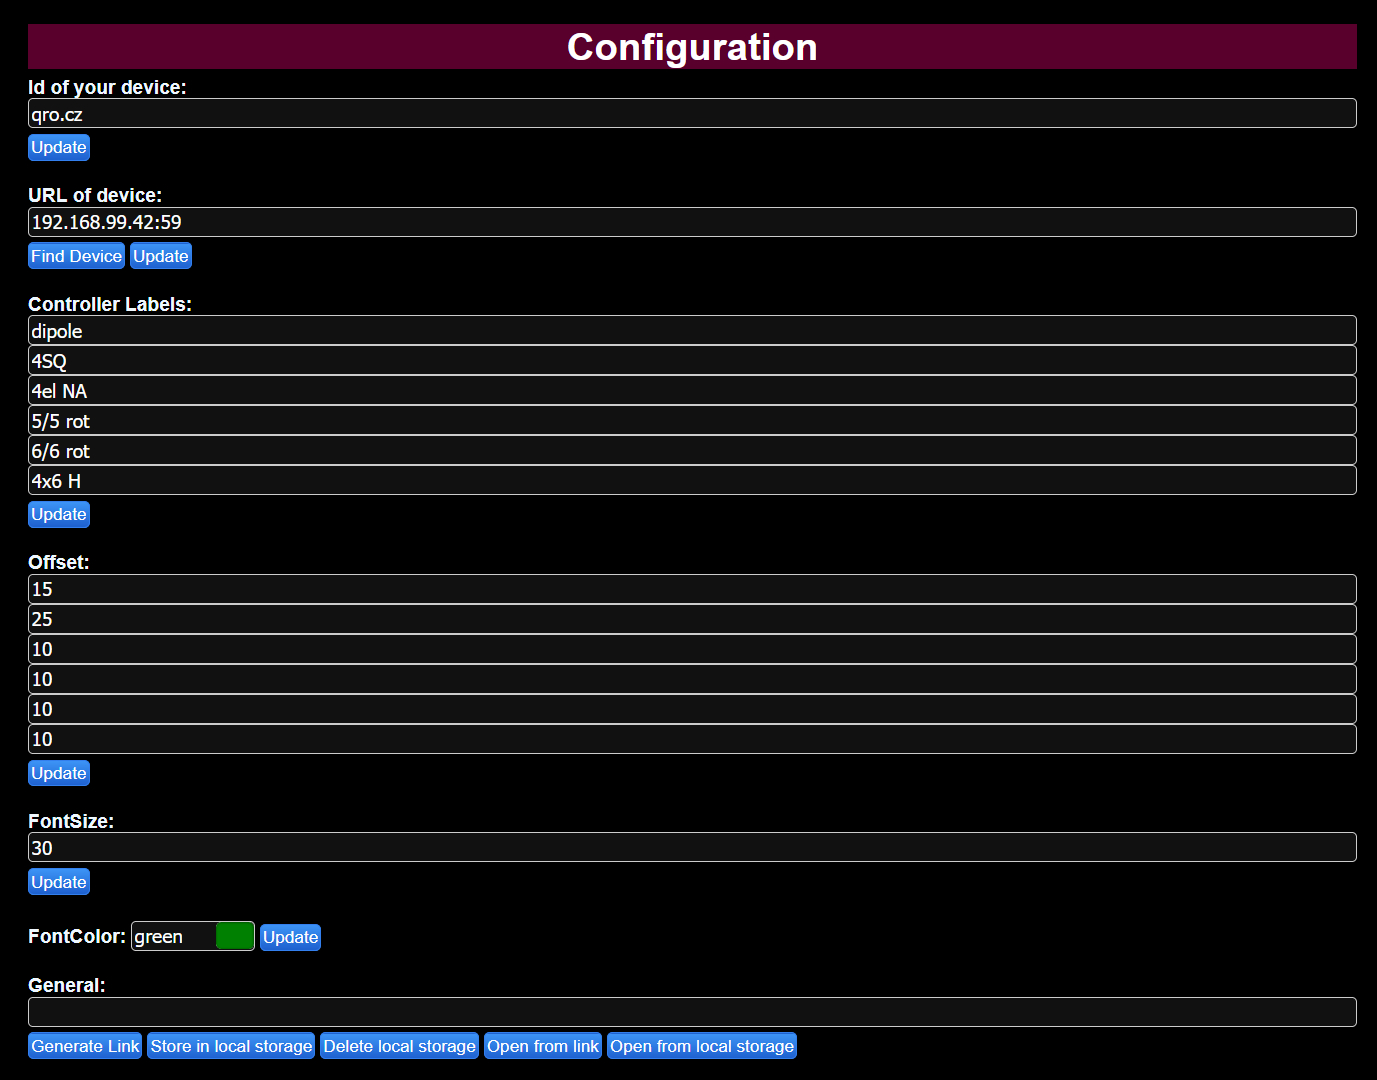
- URL of controller: IP_address:port, example: 192.168.99.54:59
- Controller Labels: Labels for antenna ports
- Offset: Setting offset of Labels - you can center it as you like
After configuration page
1. Click at the button: Generate Link
- This link you can use for any web browsers in the same network (VPN)
2. Click at the button: Open from link
- This will open new web browser window with the last configuration
- It is recommended to press Ctrl + F5 to refresh everything to the last changes
- Check small status LED at UI web - must blink when you press any button at UI
Generated link includes IP address and port of the controller in your local network (LAN). You are able to access into it only from the same network, routed network or VPN. When you use Port Forwarding at your router - you have to use your router's public IP and port you set for forwarding. When you are back in your LAN, please use local IP settings.


